Creating the Setup
Open the Toggle View Setup UI by choosing ToggleView Setup… from the Extras menu in the bcsUI. You can also open it using the MEL statement:
DPK_toggleViewSetup;If you’ve already played around with the values, you can reset them to their defaults using “File->Reset Settings”.
Choose the camera that should be moved when the setup is toggled. In most cases, this should be
“persp”—the perspective camera you’re using to model.For the other settings, see 10.4 UI Reference.
Select the object for which you want to create a Toggle View setup.
Hint
To have more than one object in the Toggle View setup, simply select a group node containing them all. Note that settings that affect an object directly, like a new material and a Toggle Smoothing setup, will only be applied to the first polygon shape node found.
Click the Create Setup button.
Using the Setup
Make sure you have a Toggle View setup in the scene. See Creating the Setup for how to create one.
Also make sure you’re looking through the camera that was configured for the setup.
Move the camera so that you can see the original object.
Press the hotkey that you have configured to trigger a Toggle View setup. See 10.2 Installation for how to set up this hotkey.
You should now see the duplicate of the original object at the exact same place in front of the camera.
Press the hotkey repeatedly to toggle between the original and the copy. Note that an undo only affects the last “real” change to the scene. Toggle View and Toggle Smoothing setups work outside of the undo-chain, allowing you to focus on the modeling no matter how often you toggle the view.
Modeling DataPoint Geometry or BlendShape Targets
Following the above steps for using the setup, you can model dataPoint geometry and quickly see the resulting deformation in action:
Create an AnimUI setup for the attributes that deform the face. For more information on the AnimUI, please see:
https://dpk.stargrav.com/pafiledb/pafiledb.php?action=file&id=3Open the AnimUI either normally or as a panel.
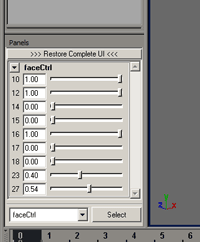
Set up and display the shortest possible names for the attributes, so that you get the maximum possible space for the sliders.
Configure the AnimUI to hide the Key and Key All buttons and maximize the slider area. (Hiding the Key All button will be implemented in the next version.) The AnimUI should now look similar to this:
Hide the original head (either directly or using a display layer).
In the bcsUI, double-click a dataPoint in order to model its shape. The created object should be at the exact same place where the original head has been.
Without changing the selection, you can quickly switch to the copy using the Toggle View hotkey and validate the vertex movement using the AnimUI.