This is the menu of the bcs UI. Even though it contains many of the operations that can be done to configure the system, some things are only possible using the UI Boxes in the left and right pane. This is because some functions require more complex user input, like defining the new position of a weightPosition.
![]()
Click a menu on the image to jump to its description.
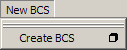
New BCS
Click an item on the image to jump to its description.
Create BCS
Creates a new bcs node with the selected objects. The currently set options are used. The last selected object will become the deformed object and the others will become dataPoints with weights (at least at default options). The created bcs node should behave the same as a created Blend Shape node with the same selection.
Advanced Info Deforming multiple objects with one bcs node is possible but not fully tested. |
Data Points
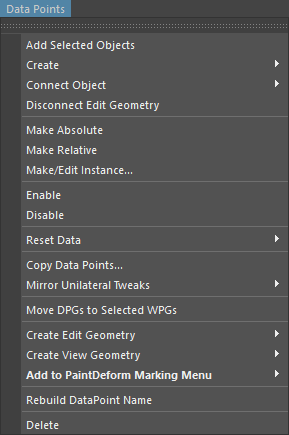
Click an item on the image to jump to its description.
Add Selected Objects
Adds the selected objects as dataPoints with a new weight for each dataPoint. Does the same as adding targets to a Blend Shape node. Of course, the dataPoints can be moved to different positions, etc..
Create Data Point
Does the same as the four create buttons. See their description.
Connect Object to Data Point
Connects the selected object to the selected dataPoint. You can specify that the object should either be the main part of the dataPoint or one of the two sub-dataPoints. The first three items will connect the object as absolute, the others as relative geometry. You cannot connect geometry to a dataPoint that already has geometry of that type. Note that only edit geometry can be connected this way.
Warning Connecting an object to a dataPoint will delete the dataPoint’s current deformation data and replace it with the object’s. |
Disconnect Edit Geometry
Disconnects any edit geometry (main/left/right) from the selected Data Points. Afterwards, the objects have no influence on these Data Points.
You can also disconnect objects by simply deleting them from the scene and re-create them by double-clicking the Data Point. However, disconnecting allows you to keep any construction history on these objects e.g. in order to modify them further and create other Data Points.
Make Absolute/Relative
Converts the selected dataPoints to absolute or relative, respectively.
Make/Edit Instance
Shows a window with a list of all dataPoints. Choosing a dataPoint and pressing the OK button (or double-clicking a dataPoint) will convert all dataPoints selected in the main dp list into instances of the dataPoint selected in this sub-window. Note that instances can’t have any edit geometry.
Enable/Disable
Enables or disables all selected dataPoints, respectively. A disabled dataPoint is simply ignored and behaves as if it didn’t exist.
Reset Data
Removes all or only a part of the deformation data of the selected dataPoints. After removing the data, the dataPoint’s part that has been reset doesn’t influence the deformation anymore until it has been edited. This will only work if no edit geometry of the removed type exists. You can either reset the whole dataPoint, only the main, or the left or right part.
Hint Resetting the unilateral parts of a dataPoint might come in handy if you want to tweak the falloff. |
Copy Data Points
This will open a new window where you can choose the dataPoint to copy from. The dataPoints selected in the main dataPoint list will be overridden with the data of the chosen dataPoint. Note that you can only copy to dataPoints that have no edit geometry.
Advanced Info You can either copy the relative or absolute values. This is independent from the modes the participating dataPoints are currently in. If you copy the absolute values, the geometry will look exactly as the source dataPoint when the target dataPoint is reached. If you copy the relative values, the same correction is done and the resulting deformation may be totally different. |
Mirror Unilateral Tweaks
If you have changed the left part of a bilateral dataPoint using the left edit geometry, you can mirror the changes to the right sub-dataPoint (or vice versa) using this function. Note that the dataPoint cannot have edit geometry on the side you mirror to.
Move DPGs to Selected WPGs
Advanced Info This is a rather complicated operation. It will reposition the dataPoints of all selected groups, so that they use weightPositions of the selected wPosGrps instead of the weightPositions they currently use. No dataPoint will change its actual position in the weight space. This means that all dataPoints will still use positions of the same weights they currently use, they just change the wPosGrp. For this to work, the new wPosGrps need to have all positions that the dataPoints will need. The easiest way to ensure this is to first duplicate the wPosGrp in order to get a new independent group. You then use this function to reposition the dataPoints you need to have more precise (and independent) control of. |
Create Geometry
This will be one of the most used and basic functions. It creates geometry for the selected dataPoints so that you can edit or view their deformation data.
For bilateral dataPoints, you can either create geometry to edit/view the main part of the dataPoint (when both sides are active) or to edit/view the unilateral sub-dataPoints. Unilateral edit geometry can be useful when you want to tweak what the automatic system has created using the falloff of the dataPoint. I recommend trying to do most of the separation with falloffs. If this isn’t enough control, you can use this to fine tune the unilateral parts of a dataPoint.
Advanced Info The edit and view geometry of a dataPoint with a plain position (involving only one weight) is the same in relative and absolute mode. For more complex dataPoints, you’ll most likely want to define the final appearance of the object. Use absolute geometry for this. With relative geometry you will edit/see the correction of the dataPoint. This is what the dataPoint adds to its pureMix in order to achieve the absolute deformation. |
Add to PaintDeform Marking Menu
Paint Deform is a modeling tool that can copy vertex positions relative to the surrounding vertices, thereby copying the local structure without moving the vertices to the absolute position. For a detailed description and manual, see Chapter 8. Paint Deform.
This menu item takes the selected dataPoints and makes them available in the PaintDeform Marking Menu at the specified radial position. This marking menu is described in more detail in 8.4 The PaintDeform Marking Menu.
The following steps are performed when you press this menu item:
If it doesn’t exist, a new group node with the name “
paintDeform_refObjGrp” is created.Geometry is created for the selected dataPoints and added to this group.
These new objects are then added to the PaintDeform Marking Menu.
Note that it doesn’t matter whether the dataPoints have edit or view geometry. The new objects will always be 100% independent and will have no connection to the BCS. This is especially useful if you model the geometry of a dataPoint and want the original shape of this dataPoint as PaintDeform Target.
When you don’t need these objects anymore, you can safely delete the group node to get rid of them. You don’t need to take any further steps to remove these objects from the marking menu, as it is dynamically rebuild and will only show existing objects.
Rebuild DataPoint Name
This is useful for better identifying inbetween dataPoints and inbetween combinations. It renames the selected dataPoints so that their name includes their exact position. It will convert a name like this:
AU10*AU17*AU27_4
into this name (given that the shown positions are used):
10*17.5*27.15
As you can see, “AU” is removed to shorten the otherwise lengthy name. Also,
when the used wPos of a weight isn’t 1, its position is added with a period.
The above name tells us that the dataPoint uses the weights AU10 at
position 1, AU17 at 0.5, and AU27 at 0.15.
The current separation string will be used to separate the different weights of a combination dataPoint.
If the dataPoint being renamed is in a group with other dataPoints, the new name is made so that the weights are below each other. For example, instead of this:
  10.5*17.5*27
  10.5*17*27.15
  10*17*27.3
  10*17*27
you’ll get this:
  10.5*17.5*27
  10.5*17  *27.15
  10  *17  *27.3
  10  *17  *27
Delete Data Point
Removes the selected dataPoints and all dataPoints of the selected dataPoint groups. If there are instances of dataPoints that are removed, they will be converted into absolute dataPoints.
Weights

Click an item on the image to jump to its description.
Duplicate Selected WPGs
This will take the selected wPosGrps (or those of the selected weightPositions) and duplicate them. This is most useful in preparation for moving dataPointGroups.
Reorder Weights
This will open a new window with a list of all weights. You can select some of them and move them up or down in the list using either the buttons or the marking menu in this list. When you have the weights in the order you want them in, press the OK button and the weights will be reordered.
Warning Don’t delete any weights while this sub-window is opened. |
Delete Weights
Deletes the selected weights, wPosGrps, and weightPositions. Any dataPoints that currently use weightPositions that will be removed have to be deleted. If there are such dataPoints (and the prompt option is on), you get the chance to cancel the deletion. Instances of deleted dataPoints will be converted to absolute dataPoints.
View
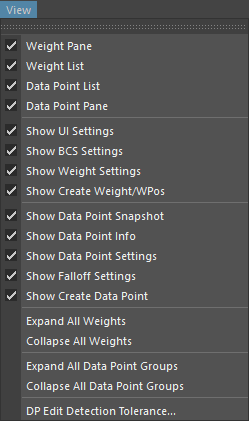
Click an item on the image to jump to its description.
Show and Hide the UI Panes
These control the visibility of the four main areas of the UI. E.g. hiding the Weight Pane (the left-most pane) and the Data Point Pane (the right-most) can be very useful to save screen space when you’re just modeling dataPoints and don’t need all the other settings.
Hint Use the pane marking menu for quickly showing/hiding the areas of the UI. |
Show and Hide the UI Boxes
With these menu items you can toggle the visibility of the UI boxes in the left and right pane of the bcs UI. Resetting the UI options will make all these boxes visible again.
Expand/Collapse All Weights
Expands or collapses all weights and wPosGrps in the weight list, respectively.
Expand/Collapse All Data Point Groups
Expands or collapses all dataPointGroups in the dataPoint list, respectively.
DP Edit Detection Tolerance
Allows you to specify a different tolerance for the detection of non-zero
deltas of dataPoints. This setting is only used in the
Data Point Info section.
The recommended default is 1e-6 (which is 0.000001).
Extras
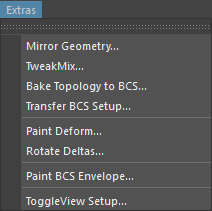
Click an item on the image to jump to its description.
Mirror Geometry
Opens a new window for mirroring geometry. This is very useful when modeling a certain dataPoint object on one side and you want the changes to also be present on the other side. Since this tool can also be used without the bcs, it has its own manual.
TweakMix
Opens a window where you can remix the selected dataPoint. Note that the dataPoint cannot have edit geometry when using this.
Here is a screen shot of the tweakMix UI.
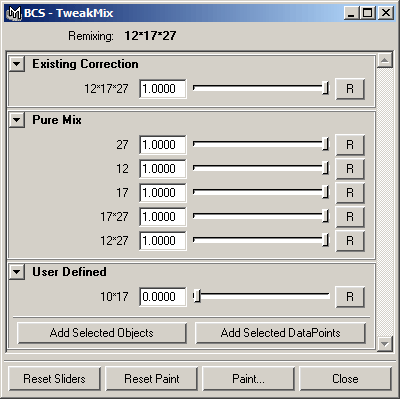
TweakMixing works by de-compositing the dataPoint into its components. These are all the dataPoints that build up the remixed dataPoint’s pureMix plus its own relative data (its correction).
The Existing Correction slider controls the influence of the relative data of the dataPoint. Since a new dataPoint (that wasn’t edited yet) doesn’t have relative data, this slider does nothing for these dps.
It is possible that some sliders are not at 1 by default (and after resetting them). This is because these dataPoints don’t participate to the pureMix with a weight of 1 but with e.g. 0.5.
The Paint… button allows you to start painting the total influence of all sliders. Painting with black results in the neutral geometry. Painting a specific slider isn’t available as a one-button-solution. There are way too many possible paint setups. Nonetheless, you can easily create such a setup by creating the necessary objects and setting up a temporary bcs manually. This can then be painted.
If you open the User Defined section, you see two buttons. They can be used to add something to the mix that isn’t originally part of it. For example, when you remix the dataPoint of the AUs 17+27 and you want to add the correction of the dataPoint 10+17, you can simply select the 10+17 dataPoint in the bcsUI and press the Add Selected DataPoints button. This will add a slider for this dataPoint’s correction.
Hint When you can’t recognize a dataPoint by its name (in front of the slider), let your mouse rest a little over the label of the slider and a popup help will show the weights and positions it uses. |
Bake Topology to BCS
Bakes the complete construction history of the deformed object into the BCS node, similar to the Bake Topology to Targets function for Blend Shape nodes. It also shares the limitation that not all changes to the construction history are compatible.
The following modeling tool are not compatible with this function:
Interactive Split Tool
Cut Faces Tool
any tool that does not behave well under input-deformations (i.e. changes the resulting topology if the input is deformed)
It does work with many of the other tools, including
Split Polygon Tool,
which can be found with right-click -> Split -> Split Polygon Tool.
Transfer BCS Setup
This will re-create the BCS setup of the current BCS node on a target object. The target object can be chosen in the GUI that opens when clicking this menu item.
It is assumed that you have set up the target object to deform together with the current setup, for example using a wrap deformer.
Hint Use a relaxed state when applying the wrap deformer. The BCS setup does not need to be in its neutral state, so you can e.g. open the mouth half-way in order to eliminate intersecting vertices and get a better wrap result. |
![]()
The two Choose buttons enter the currently selected object into the respective field.
Move Connections to New Setup controls whether e.g. an ACS setup or any other connections to the BCS weights are moved to the new BCS node.
Paint Deform
Starts the Paint Deform script. This tool has its own manual.
Rotate Deltas
Starts the Rotate Deltas script. This tool has its own manual.
Paint BCS Envelope
This will allow you to paint the current BCS node. When painting a bcs node, you paint the overall influence the bcs has on the object, not a single weight or dataPoint. The weights can still be used to deform/animate the object.
This is usually not used on a bcs node that is part of a facial setup. Instead, it can be used as a modeling tool (hence its location in the modeling menu).
ToggleView Setup
Starts the ToggleView script. This tool has its own manual.